Pages

Showing posts with label Real Food. Show all posts

Thursday, September 19, 2013

Let's Eat.

 
To me, food is joy.  Real food.  I love the entire process from menu to market, from the moment the music starts until the last dish is dry.  I love the improvisation, the expectation, the sizzle.  I love a big table, so everyone’s invited.
Let’s eat something real, something honest.  Let’s eat bold foods, foods we get passionate about, foods we’re dying to share.  Let’s know what we’re eating—and feel good about it.  Let’s eat with intention and expectation.  Let’s be fed in the deepest of ways. 
A good meal can be made of nearly anything; a plate of fruit and cheese, or hot soup and fresh bread. Whether it’s simple and fresh or an all-day labor of love, intentional food speaks the message that we are worth the effort it takes to prepare something truly good.  We are nourished; not just fuel for the machine but a life force.
Good food of any kind resuscitates body, mind, and soul. A meal can mend where we’ve been separate and heal what’s been neglected. This daily act weaves us together, feeds us deep.  The symbol Jesus gave us to remember him was meant to be shared often; tangible wine and bread broken in community.  These simple foods sustain our bodies as we remember the One who sustains life.
There is so much glory in good, everyday, real. food. 


Saturday, July 13, 2013

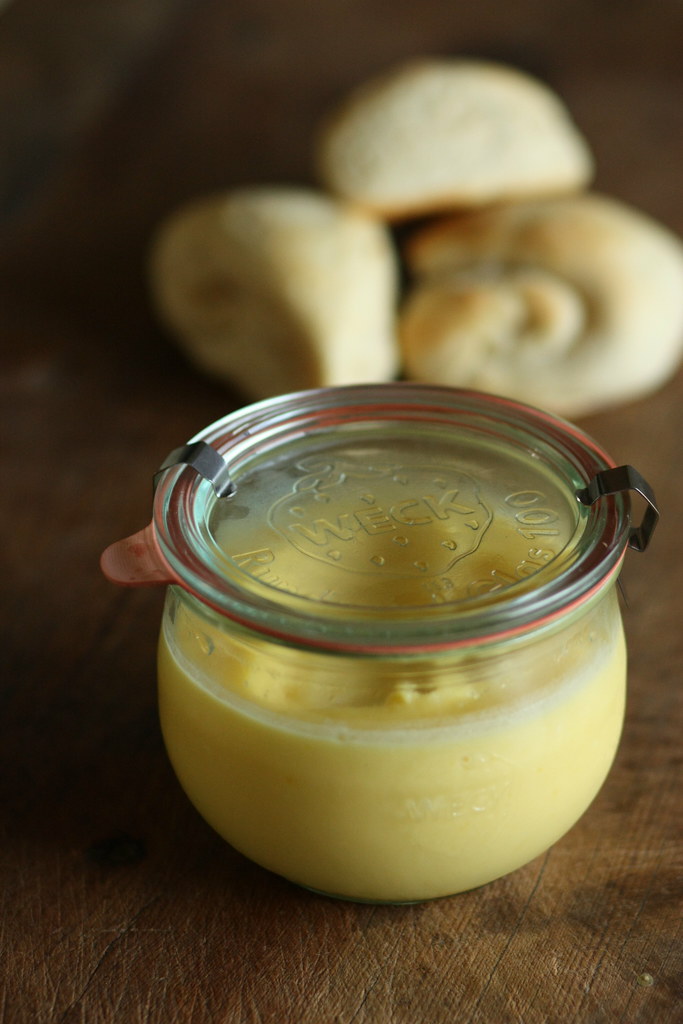
Real Food: Alice Waters' Lemon Curd with Vanilla Cream Biscuits


I picked up the Alice Waters standard, "The Art of Simple Food" at the library yesterday, and sat thumbing through it last night while Jim talked on the phone.  Before I knew it, there I was making lemon curd at 10 pm.  And as I set it to cool, and Jim was now sitting in the kitchen talking to me, I thought I might as well make up some vanilla cream biscuits for the morning, too. 
 
The lemon curd was incredibly simple.  It came together easily and quickly and as I poured it into the jar Jim spoke aloud what I had been thinking, "Shouldn't you run that through a fine mesh strainer first?
 
"Alice didn't tell me to," I said, "so this time I won't." 
 
It was silky smooth.  But next time I might use a strainer, just in case.  Old habits die hard.
 
I prepped the biscuits on a parchment-lined baking sheet, covered them well, and set them in the fridge overnight.  At 5:30 this morning, I preheated the oven while I put together the french press, tossed them in to bake, and we had something wonderful.
 
.............................................................................................................................................................
 
Lemon Curd
from Alice Waters' The Art of Simple Food
 
Wash and dry:
4 lemons
 
Grate the zest of one of the lemons on the small holes of a grater.*  Juice the lemons; there should be about 1/2 C juice.
 
Beat until just mixed:
2 eggs
3 egg yolks
2 T milk
1/3 C sugar
1/4 t salt (omit if using salted butter)
 
Stir in the lemon juice and zest and add:
6 T butter, cut into small pieces.
 
Cook the mixture in a small nonreactive heavy pan, stirring constantly, over medium heat until it is thick enough to coat a spoon.  Do not boil or the eggs will curdle.  When thick, pour into a bowl or glass jars to cool.  Cover and refrigerate.


Vanilla Cream Biscuits
This recipe is adapted from a recipe for strawberry shortcakes found in the America's Test Kitchen Family Cookbook
 
Bread flour and good butter, along with the use of a food processor creates an ultra-fine, meltaway texture in these biscuits.  Couldn't be simpler. 
 
1.  In a food processor pulse to combine:
 
2 C Bread Flour
5 T Sugar
1 T Baking Powder
1/2 t Salt
 
Add to the bowl:
 
8 T Unsalted Butter, cut into pieces
 
Pulse to combine, until mixture is fine and butter is fully incorporated.  Don't over mix.
 
2.  In a liquid measuring cup, whisk together 2/3 C Half and Half, 1 large egg, and 1 t good vanilla extract.  With machine running, pour the cream mixture through the top.  Mix until just combined.
 
3. Turn the dough out onto a floured counter and work it quickly and gently, folding it over on top of itself a few times.  A bench scraper is useful here.  Press it out into an 8x8 square, then working from the top,  roll up the dough, place it seam side down, and gently pat it into a log.  Using your bench scraper, cut it in half, then quarters.  Cut each square on the diagonal for eight triangles.  Place on a parchment-lined baking sheet. 
 
5.  Combine 2 T Half and Half and a drop of vanilla extract.  Brush the biscuits with the cream and finish with a sprinkling of sugar. 
 
6.  Bake at 425 for 12-14 minutes until lightly browned.  To make ahead, finish through step 4 and cover with plastic wrap.  Refrigerate until needed and continue with step 5. 
 
Place on a wire rack to cool slightly before serving.
 

Wednesday, July 10, 2013

Real Food: Tossed Cucumbers


There is a day coming when we will have so many cucumbers our counter will be overflowing, we'll eat them at every meal, we'll run them through the Breville with all our other garden greens and root vegetables for hundreds of glasses of juice, we'll use that same juicer to make gallons of fresh cucumber lime water, and late at night Jim and I will turn that water into icy "mojitos" just for us. 
 
Eventually we'll try to give you armloads of them every time you come over, and digress to throwing them at people we don't like.
 
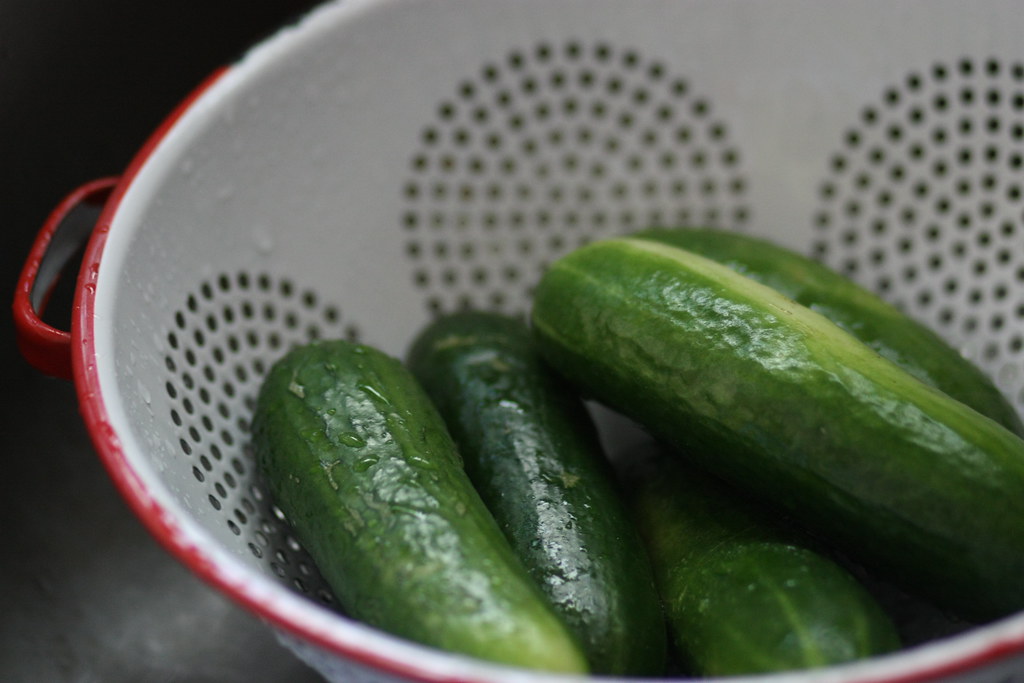
Those days are coming, but they're not here yet.  We just pulled our first five cucumbers this morning.  They're still elusive, you've got to dig for them.  Each and every one is a precious jewel.  As we searched, Hudson and Lily ready with the colander, they discussed all the things we could make with them, Hudson saying at least a dozen times, "I love cucumbers, I love cucumbers SO MUCH."
 
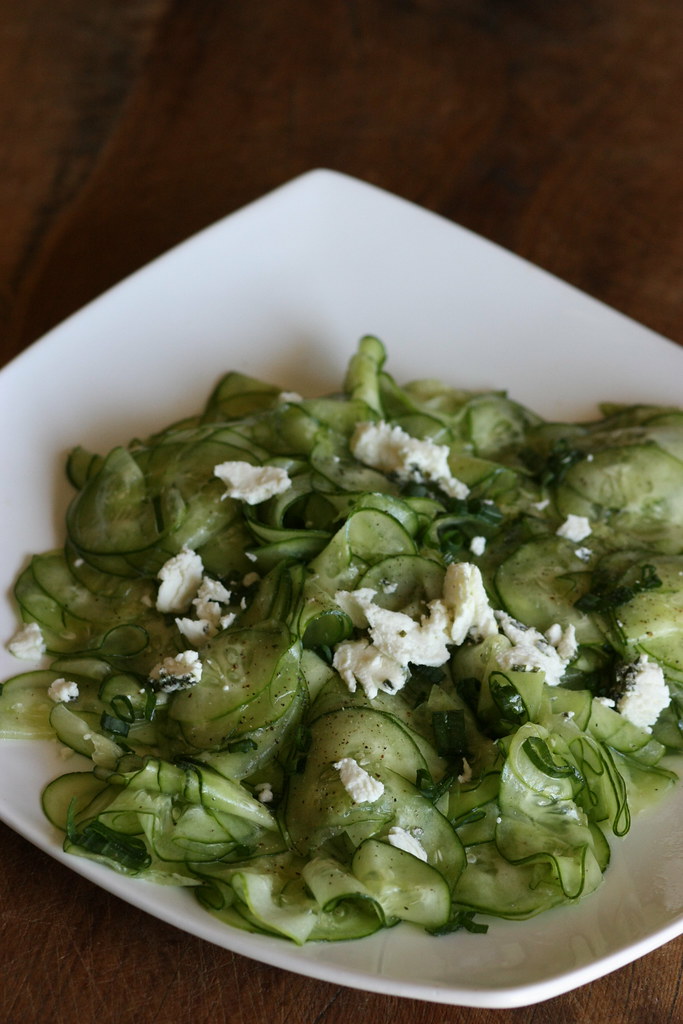
Since they're still such a precious commodity, we ate them in one of their simplest, easiest forms: tossed with what we had on hand for a quick lunch.


Cucumbers are so versatile, you can do so many things with them.  But they're always better fresh and freshly sliced, better when combined with other simple summer staples from the garden.
 
Today I poured about 1 Tablespoon good EVOO in a small bowl and to that I added a couple drops of lemon juice, half a clove of minced garlic, and some sea salt
 
I sliced three cucumbers using my mandoline, then added one stalk of sliced scallion.  I drizzled the oil mixture over the top and tossed to combine.  I finished with some crumbles of goat cheese and chives.  Salt and pepper to taste, and we were done. 
 
Some kalamata olives would have made this.  Chopped bell peppers or fresh tomatoes would have been great too.  It would have been amazing with some hummus and crusty bread or pita chips (see this recipe.)  Because they're so light and cooling, cucumbers are also nice paired with bold spices or hot peppers.  Here's another combination you might want to try.
 
The kids ate it immediately, four forks and they shared the plate.  Each one had a banana and then everyone decided they were full.  Half of us were still in our pajamas, and we accidently ate lunch an hour late.  That's summer.


Wednesday, July 3, 2013

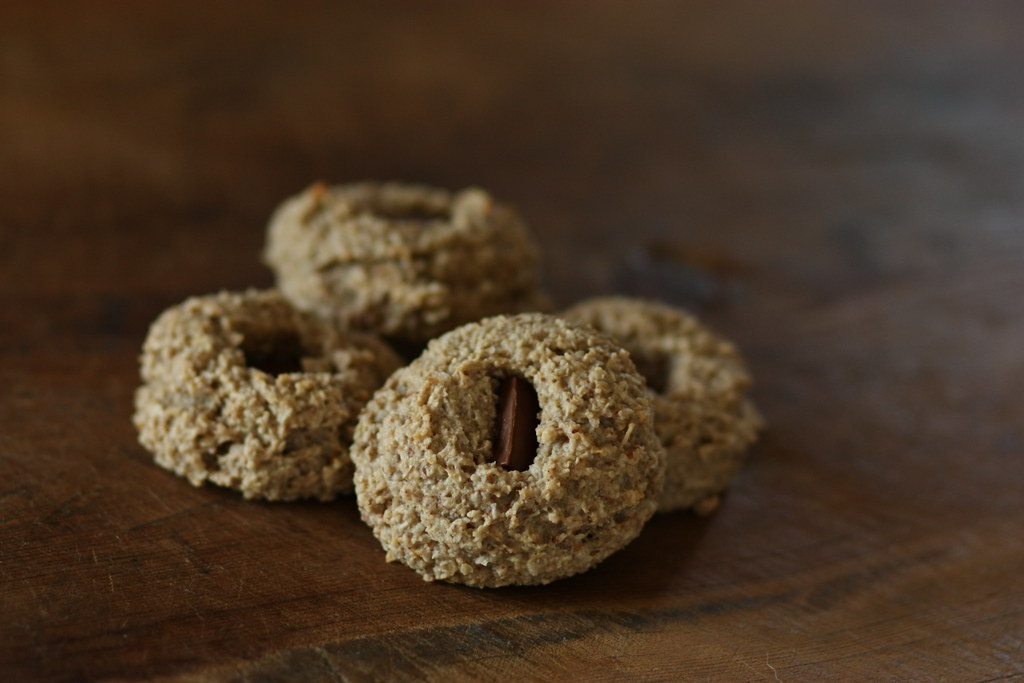
Real Food: Breakfast Cookies


Right now I'm enjoying Shauna Niequist's new book Bread & Wine and this morning I read her recipe for Breakfast Cookies, which is adapted from Nikki's Healthy Cookies, which was featured on Heidi Swanson's blog

I thought:

1.  Heidi Swanson has a blog???  How have I missed this?  And immediately added it to my Feedly.* 

2.  We could wolf these down for lunch today.

Note:  Niequist gives many suggestions for how to customize this recipe- it's very basic and you really can't mess them up (add different nuts or extracts, dried fruit etc.) 

First I'll give you her own version, then down below I'll add a note to say how I made these myself. 
.................................................................................................................................................................
Breakfast Cookies
from Bread & Wine
Serves 12

3 large ripe bananas, well mashed (about 1 1/2 C)
1/4 C coconut oil warmed to a liquid (you can also substitute olive oil)
1 t vanilla
1 C rolled oats
2/3 C almond meal
1/2 t baking powder
2/3 C shredded coconut
1/2 C chopped walnuts
1/4 C chocolate chips

Instructions:

In a large bowl, mash the bananas with a fork, then add in coconut oil and vanilla.

Add the oats, almond meal, salt, and baking powder, and stir until combined.  Add the coconut, walnuts, and chocolate chips, and stir again.

Form the dough into 12 balls on a parchment-lined baking sheet and flatten them a little bit.  Bake at 350 degrees for 14 to 16 minutes.

.............................................................................................................................................................

Doesn't that sound easy and good?  Here are a few notes about how I made ours:

1.  I recently purchased almonds for making almond meal, so once I'd finished making that up in my food processor I stored it away and used my processor to bring the cookies together since it was already out.  I think this was a bonus, I'll say more about that later.

2.  So after processing my bananas I left the machine running and poured my coconut oil and extract in through the tube.  I substituted almond extract for the vanilla.  Then I removed the top of my processor and added in the oats, almond meal, baking powder, and coconut.  I then pulsed everything together until it was uniform.

I didn't add extra nuts or chocolate, but if I had wanted to, I would have incorporated them by hand at the end. 

We keep chocolate bars on-hand in the summer for s'mores, so I cut one of those up into 24 pieces (I doubled the batch for 24 cookies) and pressed a little piece of milk chocolate into each one before baking.

3. Because I used my processor, the consistency of these cookies became uniform and fine.  So that texture combined with the almond extract and all the other ingredients made cookies that are a sweet hybrid of banana bread/macaroons/oatmeal cookies/almond joy bars.

They were delicious. 

The five of us ate an entire batch at lunch with big bowls of melon and strawberries, then sealed up the second batch to have tomorrow.


*Side note- I am loving Feedly so much. The clean, beautiful, and very organized design is a dream for creative pragmatist readers like me.

Wednesday, June 26, 2013

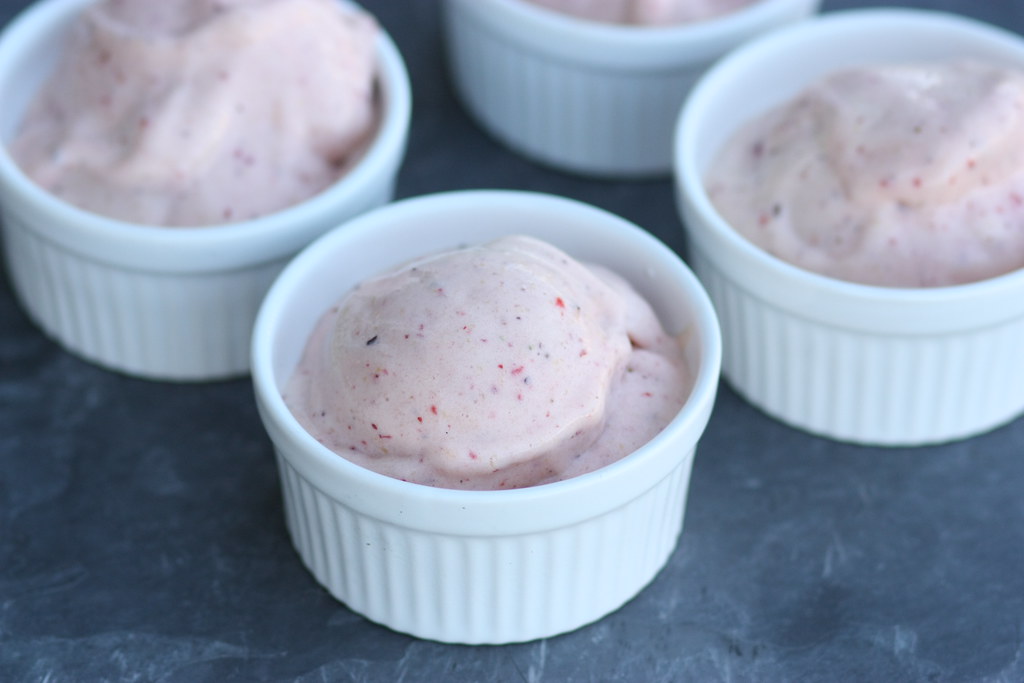
Real Food: (Almost) No Dairy (Almost) All Fruit Ice Cream


I make variations on lemon berry sorbet all the time, and really good whole fat ice cream sometimes, but this morning we tried something new (inspired by this post- click to see more varieties and ideas.) 

Actually last night I tried this by myself and added cocoa, good vanilla extract, and espresso powder- it was delicious.

.......................................................

(Almost) No Dairy (Almost) All Fruit Ice Cream
Serves 2-6, No judging

In my food processor I blended three ripe bananas, which had been sliced into coins and frozen solid.*  To this I added 2 ripe peaches, diced with skins on, one cup frozen strawberries, a quick splash of cream (optional), and bit of good vanilla extract.**
 
I blended them in my food processor until smooth. (Don't try this with a blender.)

.......................................................

This comes out the consistency of soft serve and is best eaten right away.  You could throw it in your ice cream maker to firm it up even more, but the bananas will begin to turn a bit brown if you wait to serve it- not a big deal, but not preferred.  Also, it's delicious.  You won't want to wait to eat it.

As you can imagine, flavor varieties abound.  It's a nice trick to have up your sleeve.

Originally I thought we'd make this after lunch today, but since all four of the kids woke up at the same time (never happens) we made it for breakfast.  As they watched it magically turn into "ice cream" in the processor, Hudson said, "Um, Mom, do we actually get to eat that for breakfast??" 

Yes, we do.


* Place them on a parchment-lined baking sheet and seal tightly with plastic wrap to freeze.  You can also freeze them in layers separated by parchment in a sealed and covered 9x13 pan if you want to keep some on hand for future batches.

** To make this treat more satisfying, you could add some coconut oil.  (I didn't this time.)

Tuesday, March 5, 2013

Real Food: It's all in the presentation.


Jim has been away a lot for work lately, and of course we miss him. 

Because I'm not cooking as much with him gone, and he's not commuting to work, there's some budget money left behind.  Last week I splurged on a couple of new cookbooks and a new mandoline, which I've had in my Amazon wishlist for months.  (As I type I see Jim reading this somewhere, shaking his head.)

It's awesome!

I have a food processor that can do just about anything, but it's really inconvenient to set it all up then clean it up after small tasks. 

I also have an apple peeler/corer/slicer that we use a couple of times a day.  It makes quick work when I'm making something like this, and no kid can deny an apple completely cored and sliced in one long spiral cut.  That's how I eat my apples whole, too.

But this mandoline is fast and easy to clean up when it comes to other fruits and vegetables; and because I can make paper thin slices, the kids think it's fun to eat an entire apple, core and all, in a hundred little slivers.  They also love eating carrots in julienned strips, etc.

The rituals of how we eat our foods mean so much and really make an impression on our memory.  I love making simple foods more special for my kids (and for me.) 

Wednesday, February 27, 2013

Real Food: Muesli with Sweet Vanilla Greek Yogurt


Muesli, originally from Switzerland, is a mixture of dried fruit, nuts, uncooked oats, and other whole grains.  It's very simple to create your own Muesli mix based on your family's preferences, but we buy this one ready-made.

You can use Muesli in many ways, but we like to make it the traditional Swiss way by mixing it with yogurt.  If mixing water with your yogurt sounds off-putting to you (it did to me the first time!) trust the process.  Add more or less water to adjust the consistency to your own preference.  I prefer mine to be on the thick side, but adding a full 1/2 C in this recipe gives you something a bit more thinned out.

Our kids love Muesli.  Hudson often has some for lunch, and the girls like to take it to school in a thermos.  It's not just for breakfast; it's great any time of day.  The oats and fruit plump up with the yogurt, and you'll get a nice bit of protein too.

Last week we got about 6 inches of snow, and after two hours of shovelling, Hudson came inside, called grandpa to see how much snow they'd gotten at the farm, then dug in to a bowl of muesli.


(My son is adorable.)


Muesli with Sweet Vanilla Greek Yogurt

Ingredients:
1 C Fage Greek Yogurt
1/4 C Muesli (Bob's Red Mill or your own creation)
1/4 to 1/2 C Cold Water
1T Stevia in the Raw or other sweetener
1 t Vanilla extract

Mix and refrigerate at least one hour or overnight (best.)

Tuesday, February 26, 2013

Real Food: Blackberry and Peach Oat Nut Crumbles


This recipe is simple and fast, and comes together using staple ingredients that we always have on-hand.  (Our freezer is FULL of fruit and nuts!)  I wanted a crumble that was primarily nuts, rather than grain- pecans are a nice splurge but walnuts or almonds will do.  This recipe is also a bit frugal when it comes to the fruit.  You could easily increase the fruit if you'd like.  You can also use whatever fruits you have on-hand.  These make a nice and simple apple dessert, but I'd recommend cooking down the apple slices in a skillet with the sugar and some coconut oil before baking.

I love baking these in individual ramekins because, well, KIDS LOVE TINY INDIVIDUAL DESSERTS.  Who doesn't?

For a hot and bubbly dessert, you can put these together ahead of time and set them in the oven just as you begin dinner.  

Blackberry and Peach Oat Nut Crumbles

Prep Time: 10 min.
Total Time: 40 min.
Serves: 12

For the Fruit Base:
4 C Sliced peaches, fresh or thawed
4 C Blackberries, fresh or thawed
1/4 C Raw Sugar
1/4 t Cinnamon

For the Topping:
1/2 C Coconut oil, melted, plus more for ramekins
1 C Pecans, crushed
1/2 C Rolled oats
1/3 C Brown Sugar
1 t Vanilla extract
1 t Cinnamon
1/8 t Fine Grain Sea Salt

1.  Place a rimmed baking sheet on the middle rack of your oven and preheat to 425 degrees.  Rub the inside of 12 ramekins* with coconut oil, set aside. In a large bowl, combine ingredients for the fruit base and set aside.

2.  In a medium bowl, combine the ingredients for the topping, mixing with a fork until incorporated.  

3.  Divide the fruit among the ramekins and place 2T of the topping mixture on each.  

4.  Carefully place ramekins on the hot baking sheet and bake until the middles bubble and the tops have browned lightly, about 30 minutes.  Rotate pan halfway through baking. 

*You may also use a 9x13 pan.

Monday, February 25, 2013

Real Food: Onion Soup for One (or Two)


 I really love onions, and I love french onion soup.  A really great onion soup isn't difficult, but it does take some time.  Inspired by a few of those recipes for classic french onion soup, I created this quick lunch version.

The entire recipe will have around 200 calories (depending on how much cheese you use, and you can cut back on the EVOO as well.) It's also cheap, and comes together in under half an hour.  If you mince the onion rather than slice it the cooking time will shorten significantly.

As for an unsalted beef stock (which is very hard to find) I've been using this one and it is much better than I'd expected; I do enjoy it here.  (Good thing- it's the only one I can find at my grocery store.)

Onion Soup for One (or Two)

Prep Time: 5 min.
Total Time: 15-20 min.

Ingredients:

1 Large yellow onion, sliced thin or minced
1C Unsalted beef stock
1/2 C Water
2t EVOO
1t Raw Sugar
1/2 t Fine grain sea salt
1 Clove garlic, minced
Pinch of dried time or fresh equiv.
Balsamic vinegar (opt.)
Shredded parmesan cheese (opt.)

1.  Heat 1t EVOO in a skillet with sloped sides over medium heat.  Add the onion, sugar, and sea salt and toss to coat.  Cook, stirring occaisionally, until the onions are translucent and beginning to turn a golden color, browning slightly, about 10 minutes.

2.  Add in the last teaspoon of EVOO, thyme, and garlic.  Stir constantly and cook until garlic is fragrant, about 1 minute.

3.  Increase heat to medium high and add stock and water.  Bring to a simmer and cook about 1-2 minutes more.  Salt and pepper to taste, adding a drizzle of balsamic and a sprinkling of cheese before serving.

Now let's all watch the master at work...

Watch French Onion Soup on PBS. See more from The French Chef.

Friday, February 22, 2013

Real Food: Black Bean Brownies


I originally posted about these brownies a couple of years ago, but thought I'd bring them back for the weekend.  You can find the recipe and read suggestions from other bakers here.

Black bean brownies have a distinct quality; they really do taste good, but you aren't fooling anyone into thinking these are traditional brownies (but they certainly do the trick.)

The good news is that they look very appealing, are crazy simple to make, and will probably make your kids (and you) very happy.

The brownie pictured above is made with carob chips, but milk chocolate chips are the go-to here.  If you want to go all-out swap in some chopped Green & Blacks.  Maybe two kinds...espresso and mint?  Maybe add some pecans or walnuts?  Keep the additions on the top of the brownies rather than mixed in, or you may have problems with the brownies falling apart when you cut into them.  These are great out of the oven, and if you let them sit in the fridge overnight, the chocolate flavor seems to intensify.

My other suggestions are to use melted coconut oil in place of the vegetable oil, and I like a full tablespoon of instant espresso instead of just a teaspoon of instant coffee (I highly recommend you do this!!).  Instant espresso really gives a boost to the chocolate flavor in just about any chocolate recipe, and when I use a full tablespoon, I can't taste the beans at all.  I did taste them a bit the first time I made these with just a teaspoon.  If you've never used instant espresso in your baking and don't like coffee, no worries: using instant espresso deepens the chocolate flavor but will not come through as a coffee flavor.  You can find it in your coffee aisle; there will probably only be one brand- it's worth it and lasts a while in the cupboard.

I also whip mine up in my food processor rather than in a blender like the recipe suggests.  It's so easy to throw these together; it's a good idea to make a double batch.

If you do double it, I'd recommend using two 8x8s or round cake pans rather than a 9x13, just to help them bake a bit more evenly- rotate the pans halfway through baking.  Then you'll have one batch for now, and another batch you can store in the freezer for a rainy (or in our case snowy) day.

Again, find the recipe here.

Thursday, February 21, 2013

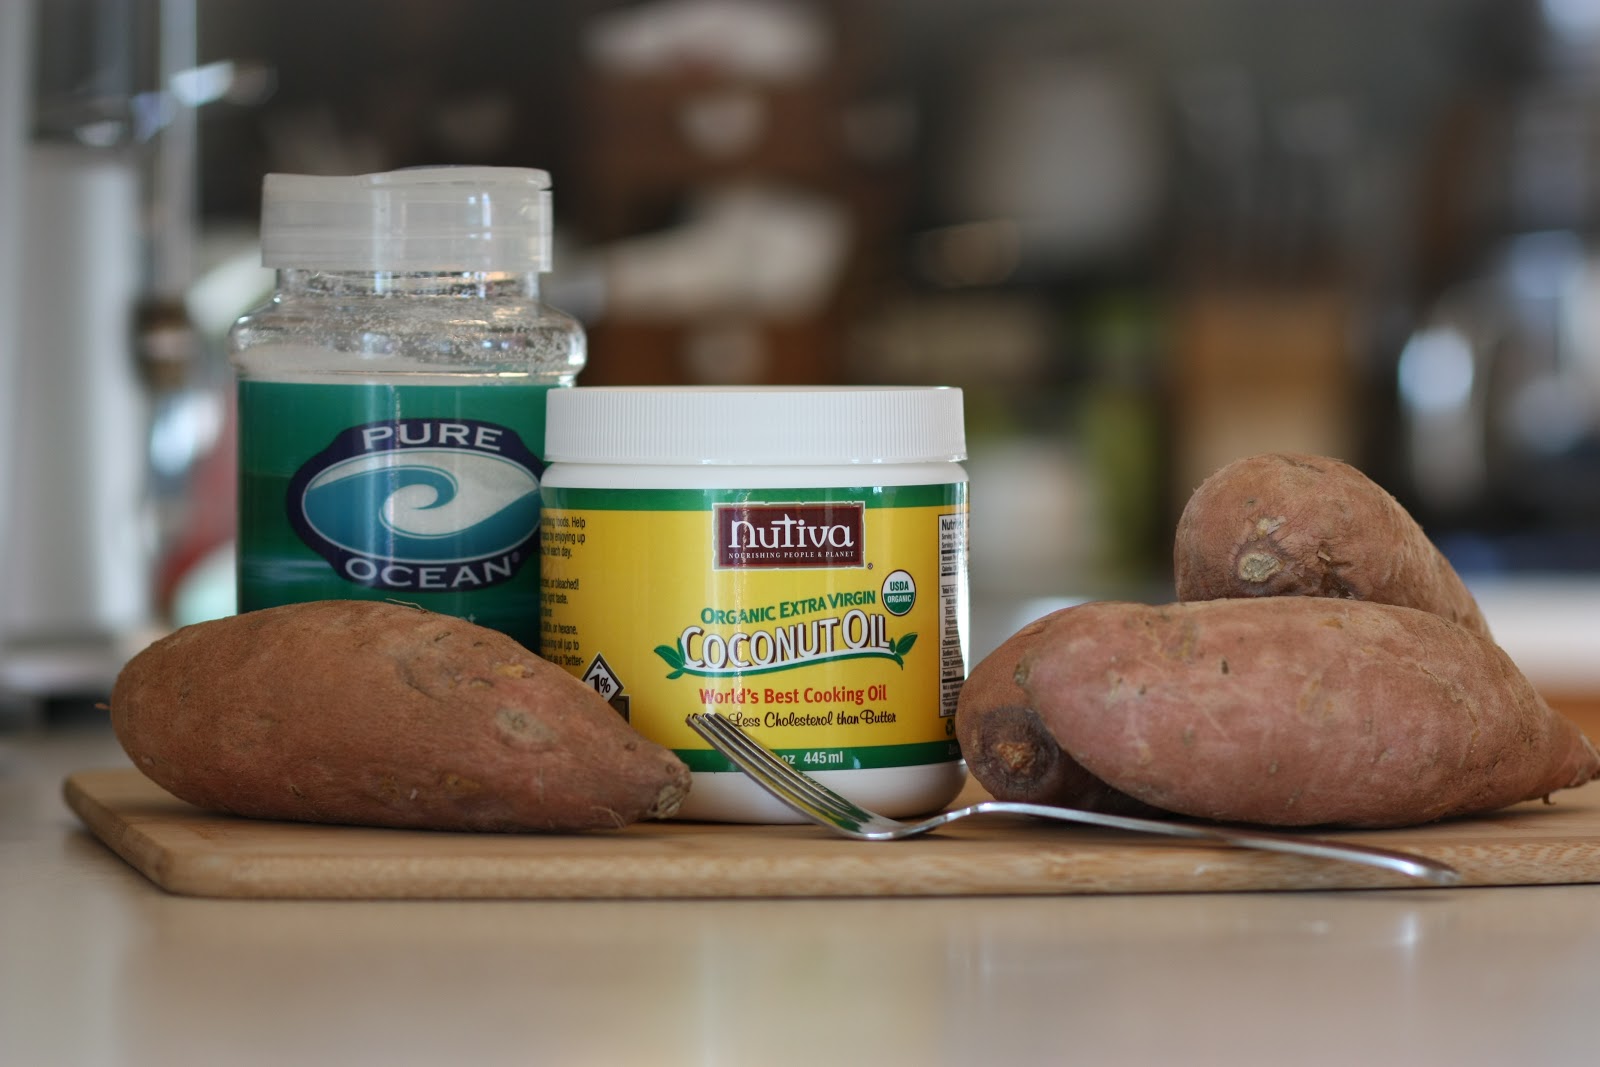
Real Food: Roasted Sweet Potatoes


Here is a lovely and simple way to enjoy sweet potatoes.  Whether you're baking them ahead and storing them up for use in other recipes or having them with dinner, these taste awesome just as they are.

This is a technique that most cooks already understand and probably use, but if you aren't regularly enjoying sweet potatoes, let this be a gentle reminder that they will knock your socks off.

Roasted sweet potatoes are great as-is, but you can also add a bit more coconut oil, some salt and pepper, or even some cinnamon and sugar before eating.  

These are so simple to make we have them at least once a week; they're especially easy to throw in the oven with a roast chicken or pot roast.  Then we add a big pile of salad greens to our plate and it's an easy weeknight dinner.

Roasted Sweet Potatoes

Prep Time: 5 min.
Total Time: 65 min

Ingredients:

Sweet potatoes of similar size (bake as many as you need)
Coconut Oil
Fine Grain Sea Salt

1.  Place oven rack in middle position and preheat to 425.  Clean and dry the sweet potatoes and pierce the flesh of each several times with a fork all around the potato.

2.  Rub each with a generous coating of coconut oil* and sprinkle lightly with fine grain sea salt.  Press the oil and salt gently into the flesh of the potatoes, then tightly wrap the potatoes individually in foil.

3.  Place 2 inches apart on a rimmed baking sheet and bake for one hour, turning halfway through.  When the middles are soft, they are done.  Don't be afraid to let them cook a bit longer; they only get better the longer they bake.  

4.  Remove from the oven and cool slightly before unwrapping.  Remove skins at the table as you eat, or cool completely to remove skins before storing or freezing for another use.

*Use common sense here- I don't mean slathered with gobs of oil but don't be too stingy!

Wednesday, February 20, 2013

Real Food: Toasted Coconut Quinoa


Inspired by this granola recipe, I set out to make a quicker and crunchier version; something that would be used primarily as a topping.  I arrived at a tasty cross between granola and Grape Nuts.  

This toasted quinoa works very well as a topping for fruit or yogurt.  Here I have it paired with some dark sweet cherries (which we buy frozen in winter.)  It's great with peaches, berries, or apples, and can turn simple fruit into dessert- especially if you serve the fruit warm.

Toasted Coconut Quinoa

Prep Time: 1 min.
Total Time: 6 min.

Ingredients

1T Coconut Oil
1/2 C Quinoa, uncooked
2T Natural coconut
1/4 C Raw almonds, crushed
1t Raw sugar
Cinnamon

1.  Melt coconut oil over medium heat.  Add quinoa, coconut, and almonds and toss to coat.  Cook, stirring constantly, until the coconut and almonds begin to toast and become fragrant and "nutty", about 2-4 minutes.  Watch it closely!!

2.  Add sugar and a sprinkle of cinnamon to taste; toss and cook, stirring constantly, until sugar has completely dissolved, about 1 minute.

Cool and store in an airtight container in the refrigerator.

Tuesday, February 19, 2013

Real Food: Easy Roasted Vegetables with Garlic and Parmesan


Two notes on this simple recipe:

1.  I've learned a lot of useful things from Cooks Illustrated, one of them being that there is no shame in microwaving a vegetable to speed the cooking process before finishing on the stove top or in the oven; something I first picked up while using The Best 30-Minute Recipe.  (My favorite cookbook for the last several years.)

2. Roasting vegetables in the oven is my favorite way to enjoy them- but it takes time.  Steaming is a quick and simple way to cook vegetables, but I've always disliked how "wet" they can seem when prepared this way, even after draining; and they never seem to stay warm for long.  Is this just me?  Have you noticed?  It's a very lack-lustre way to go, even when you toss them in EVOO etc. for a flavor boost.

This technique solves that problem, and, thanks to the microwave and broiler, takes very little time. This is a basic recipe; it's easy to add in herbs that complement whichever vegetables I'm roasting.  It's also a nice way to dress up inexpensive frozen vegetables in winter.  This extra step in the oven, combined with the EVOO and garlic, allows for so much more flavor to develop with very little effort.


Easy Roasted Vegetables with Garlic and Parmesan

Prep Time: 5 min.
Total Time: About 15 min.

Ingredients:

2-4 Cups of your favorite vegetables, prepped and steamed
1T EVOO
1 Clove Garlic, minced
1/4 t Lemon juice
Crushed Red Pepper Flakes
Fine Grain Sea Salt
Pepper
Grated Parmesan Cheese

1. While the vegetables are steaming, combine EVOO, garlic, lemon juice, and a sprinkling of red pepper flakes in a small bowl.  Place top oven rack 6 inches below heating element and turn on broiler. 

2. Once the vegetables are finished steaming, drain well.  Arrange in a single layer on an oven-safe plate.  Drizzle the EVOO blend on the vegetables, season to taste with sea salt and pepper, and toss to coat.  Sprinkle parmesan evenly over the top.

3.  Broil until the cheese is nicely browned, about 6-10 min.  Watch it closely!

Enjoy.

If you're cooking for a crowd, multiply as needed and arrange on a baking sheet lined with non-stick foil rather than on an oven-safe plate.


Within 30 seconds of taking that shot... 


...the wolves descended, like something out of National Geographic.  No veggie left behind.

Kids don't hate vegetables.  They hate bad vegetables.  (Me too.)

Monday, February 18, 2013

Real Food: Warm Apples, Cranberries, and Walnuts with Feta Cheese


 I'm breaking out one of my favorites today.  It's very common to see apples, cranberries and candied walnuts in salads, but when it's cold outside I want something warmer than greens.

Inspired by that flavor combination, I created a version that is wonderful year-round and builds flavor from just a few simple, natural ingredients.  It's fast and easy and makes a great snack or lunch (or even dessert... or a side at dinner... basically it's always good.)

Not only does this come together quickly, but you will be amazed at how nicely the sugar melts and coats the walnuts.  Have. Mercy.

A good feta or blue cheese balances really well with the sweet apples, tart cranberries and toasted nuts, so if you're afraid of strong cheeses, be bold and give them a shot.  A gentler cheese's flavor just won't hold up here- but you could try a sharp cheddar instead.

Your kids will probably love this too; it's easy to multiply the proportions to meet your needs.


Warm Apples, Cranberries, and Walnuts with Feta Cheese 
Prep Time: 5 min.
Total Time: 12 min.
Serves: 1-2

Ingredients

1T Coconut oil
1 Green apple, peeled, cored and sliced
2T Dried Cranberries
1/4 C Raw walnuts, roughly chopped
1t Raw sugar
1T Crumbled feta cheese
1. Melt coconut oil over medium high heat.  When the oil is completely melted, add the apples and cranberries and turn to coat.  Cook, stirring occasionally, until the apples begin to brown on one side.
2.  Lower heat to medium.  Add the walnuts, stirring often, until they are toasted- about two minutes.  When the walnuts become fragrant and nutty, add the sugar and stir constantly until it has dissolved, about 1 minute more.  Transfer to plate and top with the feta cheese.


Friday, February 15, 2013

Real Food: Quinoa Cakes and Sweet Berries


When I first came across this Martha Stewart recipe for Quinoa Cakes I passed it by, assuming it was just a recipe for pankcakes using quinoa flour.  After a second look, I realized it was a very simple pancake recipe that used cooked quinoa in place of most of the flour.  You could also use rice.

These small cakes are delicious, but have a unique quinoa flavor and are much more savory than traditional pancakes.  I liked this; it balances much better with sweet toppings- but they are not a direct swap for a traditional buttermilk pancake; much more chewy than fluffy, though I wouldn't call them dense by any means.  

They are a type of pancake, though, and with all that protein, they are much more satisfying than a traditional pancake could ever hope to be.  They were also extremely fast to put together, especially if you keep cooked quinoa on hand.  If you don't, it just means whipping some up before you begin.

My kids (who loved them at first sight due to their size and love of all pancakes) ate them in a flash.


A few notes: I substituted whole wheat pastry flour for the all purpose flour, and used coconut oil rather than butter for the cakes and the griddle.

As the recipe states, flip the cakes when bubbles appear on the surface.  However, I found that though they be small, they be mighty.  When left alone after flipping they are still quite thick and the middles were not fully cooked by the time the bottom was browned.  After flipping your cakes, lightly press down on each with your spatula to thin them out a bit.  That solved the problem for me.

As for a sweet berry topping, I combined 2 C frozen strawberries and 1 C frozen mixed berries and microwaved them until they were almost completely thawed.  I tossed them with 1 t raw sugar and let them sit while I made the cakes.

Quinoa Cakes

Ingredients

  • 1 cup cooked quinoa or brown rice
  • 3/4 cup all-purpose flour 
  • 2 teaspoons baking powder
  • 1/2 teaspoon coarse salt
  • 1 large egg, plus 1 large egg white
  • 1 tablespoon unsalted butter, melted, plus more for skillet
  • 1/4 cup low-fat milk
  • 2 tablespoons pure maple syrup, plus more for serving
  • Fresh fruit or fruit preserves (optional), for serving

Directions

  1. In a medium bowl, whisk together quinoa, flour, baking powder, and salt. In another medium bowl, whisk together egg, egg white, butter, milk, and syrup until smooth. Add egg mixture to flour mixture and whisk to combine.
  2. Lightly coat a large nonstick skillet or griddle with butter and heat over medium-high. Drop batter by heaping tablespoonfuls into skillet. Cook until bubbles appear on top, 2 minutes. Flip cakes and cook until golden brown on underside, 2 minutes. Wipe skillet clean and repeat with more melted butter and remaining batter (reduce heat to medium if overbrowning). Serve with maple syrup and fresh fruit or preserves if desired.

Thursday, February 14, 2013

Real Food: Citrus and Red Berry Salad


This is simple, but good.  

For Valentine's Day, I thought I'd post about a fun fruit that is sentimental to me: the pummelo.

Coupled with some berries it makes an appropriately sweet red treat for love day, and happens to be great for the heart as well.

Every winter we buy one pummelo.  It's a tradition we've kept up since 2001. Pummelo fruits are like a semi-sweet cross between a grapefruit and a raspberry.

This year we used our pummelo to make a simple salad.  That really stretches it out when splitting it between six people.  In fact, Jim ended up coming home late and he didn't even get any.

After thawing 2 cups of frozen berries I added some pummelo wedges and tossed them together.

If you're not familiar with how to cut citrus fruits for an optimal eating experience and minimal waste, check this out.

Happy Valentine's Day!

"But the great thing to remember is that, though our feelings come and go, His love for us does not.  It is not wearied by our sins, or our indifference; and, therefore, it is quite relentless in its determination that we shall be cured of those sins, at whatever cost to us, at whatever cost to Him." - C.S. Lewis, from Mere Christianity, Book 3, Chapter 9

Wednesday, February 13, 2013

Real Food: Hot Drinks


Talking ginger tea got me thinking I should just post a big list of all the everyday hot drinks I love.  I've included some "Where can I  find it?" commentary for locals (and of course if you don't have it in your area, you can probably find it online.)

Let's jump right in......


Cherrybean Coffee, Caribbean Queen

This is a local roaster and I love this blend!

I get mine at Hy Vee in the Health Market (it's not sold in the regular coffee aisle.)  Cherry Bean always has a booth at the Farmer's Market, and some downtown businesses serve it (like The Cookie Jar.)

Yerba Mate

If you like green tea, this smells quite "green," but isn't related; Yerba Mate comes from a South American holly tree*.  The. best. way to brew it is with a filter bag- rather than a tea ball or french press- for removing sediment.

The jury is out on whether it's a miracle or carcinogenic.  I drink it a few times a week.  It's delicious, smooth, and gives a great energy boost.

You can find it at Pomegranate Market with the other teas.

Crio Bru

100% Cocoa beans, roasted and ground.  That's it.  Antioxidants and a lovely chocolate flavor in one.

You brew them just as you would coffee, though it is greatly improved in taste and nutrition if the grounds are allowed to steep for about 12 minutes, so a press or filter are best, rather than using your coffee maker.  There are many varieties, and I've tried three (there are only a few available at our local natural foods market.)

Cavalla is my favorite so far, though they've all been good.  It's amazing how distinctive the flavors are- beans grown in different environments.

I usually have this in the afternoon, and take it in a to-go cup when I pick up the girls from school.  On the days I have it, they get in the car and say, "Mom, the car smells like chocolate!" and they know what's in the cup.  Kids can have it, too- and though it does contain the stimulant theobromine (which you will notice) it's fine to have before bed without disrupting sleep.  It's great for chocolate cravings, and is a way to get the health benefits of chocolate on a regular basis without the added fat, sugar, and calories.

You can find it at Pomegranate Market in the tea and coffee aisle.

Lipton Superfruit Green Teas

These are easy and delicious.  We have several kinds in the kitchen at all times.  The girls make themselves tea fairly often; they love these!  Jim (not a big tea drinker in the past) has started having some almost every night.  He started when he had a cold, but kept it up.

Celestial Seasonings Decaf Green Tea with White Tea 

They make a great decaf green tea made with white tea that has a smooth taste for a low price.  I love this one before bed.

These teas are available at just about any grocery store and at Target.

Rooibos Tea

Rooibos is also known as "red tea" or "redbush tea".  It comes from a South African plant.  Alone it has a sort of earthy sweetness, almost like honey.  It's naturally decaffeinated and is one of my favorite things to drink in the world.

I have been drinking it for a few years, but in Zambia there are two kinds of tea that you can get just about anywhere: Rooibos and Five Roses.  So it isn't just good, it reminds me of a place I love, and brewed it's as red as African soil.

Finding a good rooibos is a bit harder.  Sometimes you'll see a Tazo blend, like a vanilla rooibos at Starbucks; you can try that.  But you can get a great rooibos from Equal Exchange at Ten Thousand Villages, and there is a decent Twinings rooibos at World Market.

Silk Dark Chocolate Almond Milk 

This is the way to have hot chocolate.  Step one: pour in mug.  Step 2: heat.  Delicious.
You can cut in some original or vanilla almond milk to cut the sweetness if you'd like.

I have found this at Hy Vee in the Health Market and at WalMart in the dairy section.  I assume you can find it at Target as well.

Silk Coconut Milk and Almond Milk

These are both fantastic warm, too.

You can buy them already flavored with vanilla and slightly sweetened, or you can make your own sweet vanilla milk by adding extract and some honey or raw sugar.  This is what I do, so I have unflavored milk, which is more flexible for everyday use.

I like to take it up a notch and add in some cinnamon and cardamom for a nice vanilla spice "chai" without the black tea (though you could certainly add some.)

You'll find this with the Chocolate Almond Silk.  Sams sells a three pack of Original Almond Milk that saves us about $2, so that's where we get it.  


Again, I'd love to hear your suggestions!


*A certain Boy Who Lived had a wand made from a holly tree; maybe you don't understand.

Tuesday, February 12, 2013

Real Food: Fresh Ginger Tea


Today I wanted to share a simple way to make your own fresh ginger tea.

This is very easy, but if you don't regularly use ginger, you might not have thought of it.  In addition to being delicious and relatively inexpensive, ginger has a fine reputation for doing your body good.

I like to brew a cup of green tea (usually this one,) then I grate a 1" piece of ginger root (skin removed) over a small plate using a microplane grater.

Next, I flip my grater over "safe" side up above my tea cup, and place the grated ginger on top.  I use the flat side of my knife to press and extract the juice from the grated ginger*, and give my tea a stir.  Sometimes I actually toss the grated ginger in the cup as well for an extra punch.

When I'm looking for an afternoon pick-me-up, I might use a caffeinated green tea, and toss in some coconut oil and honey along with my ginger for a little boost.

You might consider adding ginger to your favorite spiced tea, or a fruit tea, such as pear or berry.

Hot tea on a cold day is a good way to get warmed up; hot tea infused with ginger is even better.


*This makes me feel like I'm in Potions class.  You might not understand.

Monday, February 11, 2013

Real Food: Black Bean Salsa


This recipe couldn't be simpler.  I'm sure there are many, many recipes out there for black bean salsa.  This one, however, was created by me, in my kitchen, last summer.  It's catered to my very strong affinities for cilantro and cumin.  My kids love it, and Jim likes it too.  I made a big batch for this post, and the next day it was nearly gone.

When we see salsa, we think chips. Chips are a fantastic vehicle for this salsa, but typically I use an alternative method: a spoon.

This salsa is great on it's own, but can make a sturdy lunch when coupled with some quinoa.  (I make a big batch at the beginning of the week and keep it in the fridge for times like this.)  Throw it together with some lime and maybe some greek yogurt or a Wholly Guacamole 100 Calorie Pack and you're set.  You could even toss in some chia seeds just before you dig in.

Simple Black Bean Salsa

Ingredients

1 Large Red Onion, minced
1 Can Black Beans (26.5 oz.), rinsed
1 Can No Sodium Added Diced Tomatoes (28 oz.), petite cut preferred
1 Clove Garlic, minced
1 Bunch Cilantro, Stemmed and Chopped
1 T Extra Virgin Olive Oil
1 t Lemon Juice
1 t Cumin
1/2 t Cayenne Pepper
Fine Grain Sea Salt and Pepper to taste

Simply combine all ingredients, cover, and refrigerate.  This can be eaten immediately, but the flavor improves when it is allowed to sit overnight.  

I like to bring this recipe together in my food processor, but this isn't necessary. If you won't be using a food processor, petite cut tomatoes are a nice shortcut to an even texture.


Thursday, February 7, 2013

Real Food: Apples and Oats.


When I need to eat a meal that's going to keep me energized for hours, I eat this.  For instance, it's the perfect thing to keep me focused and not hungry while I'm running errands, shopping, and out all morning.  But, then again, I usually make this in the afternoon for an energy boost as I head into the witching hour.  It's great with coffee or a hot cup of tea.

A few more notes: This contains a full tablespoon of coconut oil, which contributes 130 out of 325 calories.  If you'd like to use less oil go ahead, but that coconut oil gives a huge boost and makes this meal much more satisfying; it's up to you!

Also, I prefer my oats toasted and chewy.  If you'd like this to turn out more like a traditional oatmeal, add more water as needed and increase the cook time.  You can also increase the oats to a full half cup and increase water in kind.  Quick oats would also speed this up.  When I make this for my children, this is what I do- it makes a great after school snack or quick dinner before we run out the door on a busy night. 

The thing that takes this a step up from traditional apple cinnamon oatmeal is that with this skillet method, the flavors have time to really come together- and most importantly- the oats and spices have a chance to toast for a fuller flavor, which makes all the difference.

You also might consider adding some raisins, dried cherries, etc in with the apples for a little something extra- they will plump up as you cook them.

Apples and Oats

Prep Time: 5 min.
Total Time: 10-12 min.
Serves: 1
Calories: 325

Ingredients:

1 Apple, peeled, cored, and sliced thin
1 T Unrefined Coconut Oil
1/4 C Whole Oats (see above)
1 t Raw Sugar
1 t Cinnamon
1/4 t Cardamom
1/4 t Ginger (Fresh is best if you have it)
1/2 C Water, plus more as needed

1.  Peel, core, and slice the apple into thin, even slices.  I do enjoy eating the peel- but that's up to you! Prep all other ingredients so you can move quickly once you begin.

2.  Heat 1 T Unrefined Coconut Oil in a skillet over medium high heat.  Add apples, turning to coat.  Cook, stirring occasionally, until the apples have softened a bit and are beginning to brown on one side, about 5 minutes. 

3. Add sugar and stir constantly until it has dissolved.  Remove skillet from heat, keep the burner on. Off heat, stir in oats and spices, tossing to coat.  Return to heat, stirring constantly.  This allows the oats and spices to toast a bit, which boosts flavor- but be careful not to scorch them! 

4.  When the oats become fragrant, add the water.  Allow to simmer, stirring often, until all water is absorbed and the mixture is the desired consistency (see above.)